I was looking for DIY Halloween ideas this year because we simply don’t have much to decorate with at our house. Then Karly from KPApreps shared this fun, cheap craft project on her blog. I had to try it! Check out the Jack-O-Lantern candle holders tutorial below and some of the changes I made.
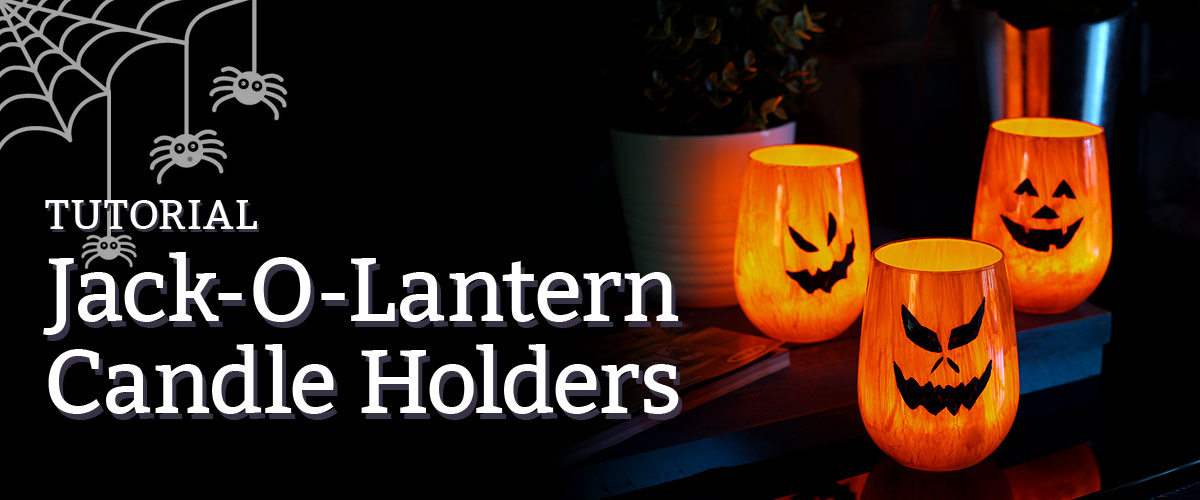
Jack-O-Lanterns are a great, outdoor decoration. But what if you want to have some pumpkin fun inside your house? Here’s how to make these Jack-O-Lantern candle holders with some cheap, dollar store supplies.
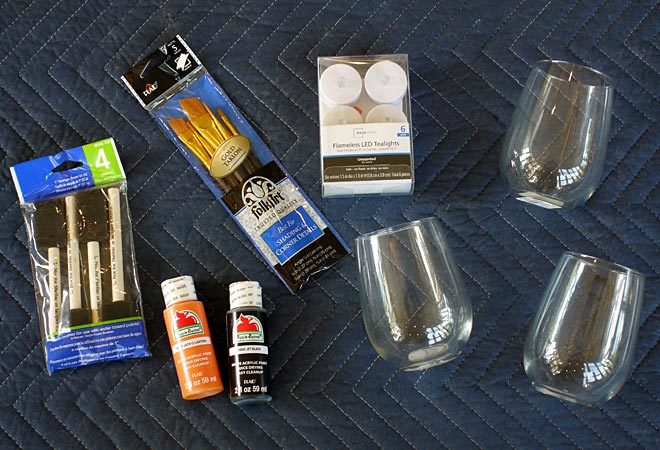
The supplies you’ll need
Head to the dollar store and grab some cheap, drinking glasses or glass bowls. You can also usually find these at your local thrift store. I had to buy the rest of these supplies too, but you may have them already if you do lots of craft projects.
- small votive holders, drinking glasses or glass bowls
- acrylic paint
- foam paint brushes
- fine-tip paint brushes
- votive/tea lights (I chose LED)
I’ve included links to some cheap options on Amazon if you don’t want to leave your house. 🙂
Let’s make some pumpkin candle holders!
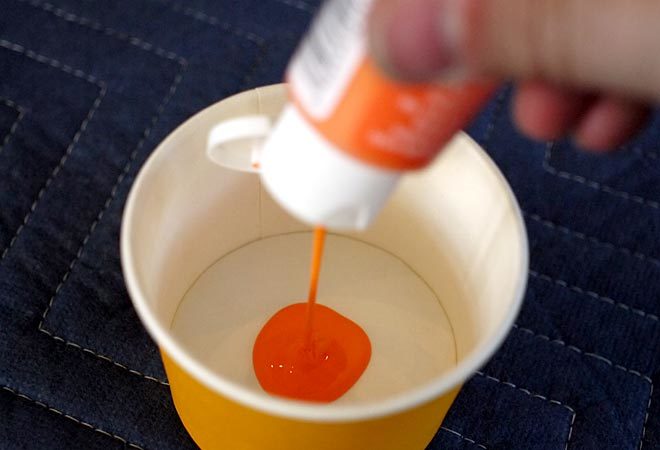
Start by shaking up the orange acrylic paint and squirting some into a disposable paper cup or plate. I ended up using a lot more than I thought I would, so go crazy. We’ll be putting on a couple coats so no worries about wasting it.
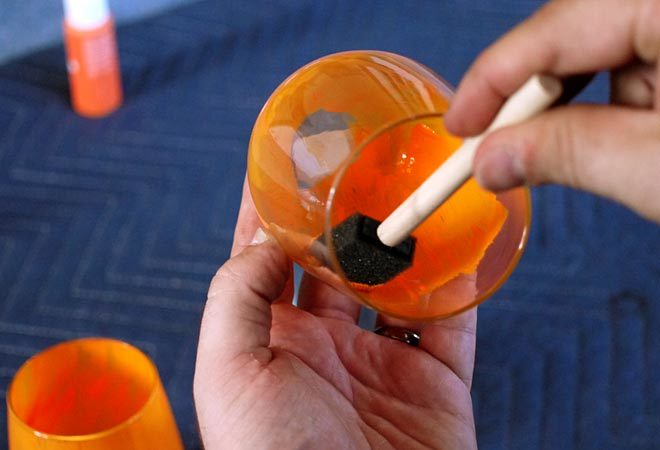
Using your foam brush, paint the inside of the glass. Start from the bottom and work your way up toward the top to avoid smudging the paint with your fingers.
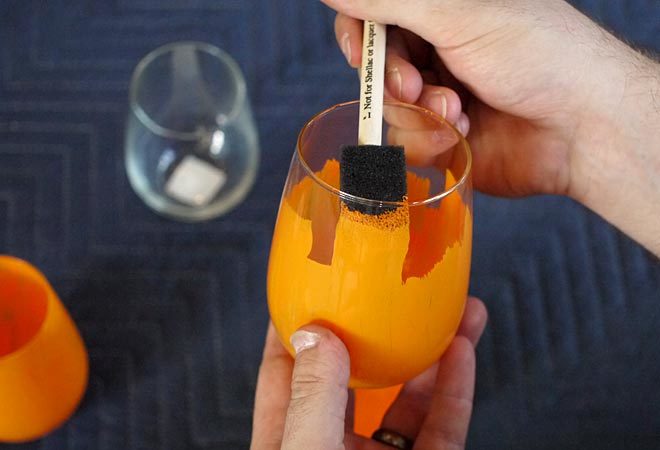
I had trouble getting a solid covering of paint. It was very streaky and I noticed that my second and third coats caused the dried paint to come off if I wasn’t careful. If I did this again, I would start by sanding the inside of the glass with a fine sandpaper. This should rough it up and give the paint something to adhere to.
That means you’ll need to be careful with your finished candle holders so you don’t scratch the paint off. But mine turned out just fine and the streaks in the orange paint almost look like a natural pumpkin texture.
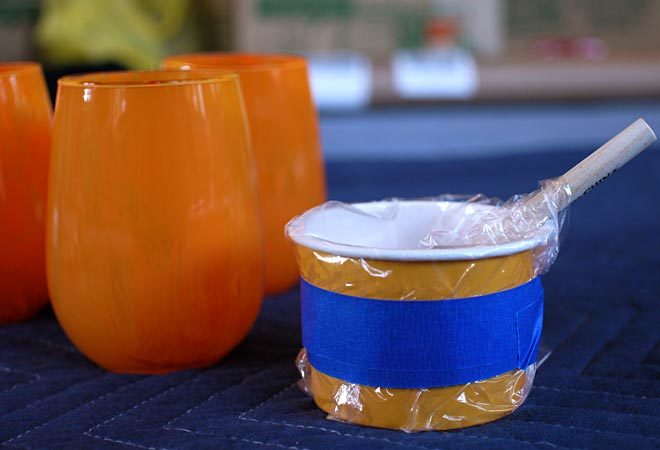
Check your acrylic paint for recommended dry time between coats. I didn’t want the paint to be wasted, so I saved the paint and the brush by wrapping the paper cup in plastic wrap. It lasted through three coats like this.
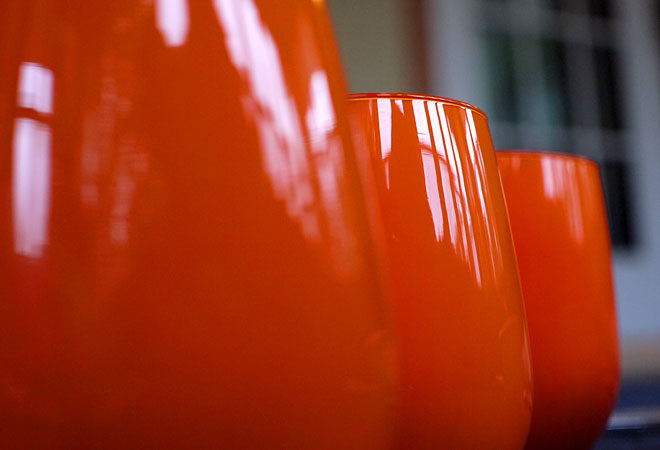
The completed pumpkins look really cool. You’re done on the inside now, so you can jump straight to painting the outside without waiting for it to dry.
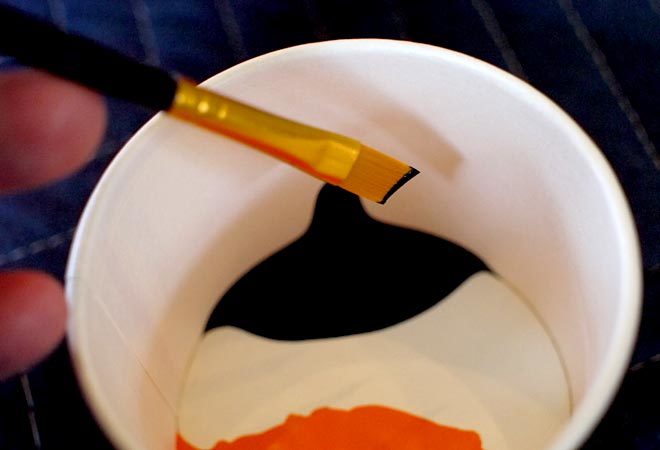
Put some black paint in the cup and grab your fine tip brush for some face painting!
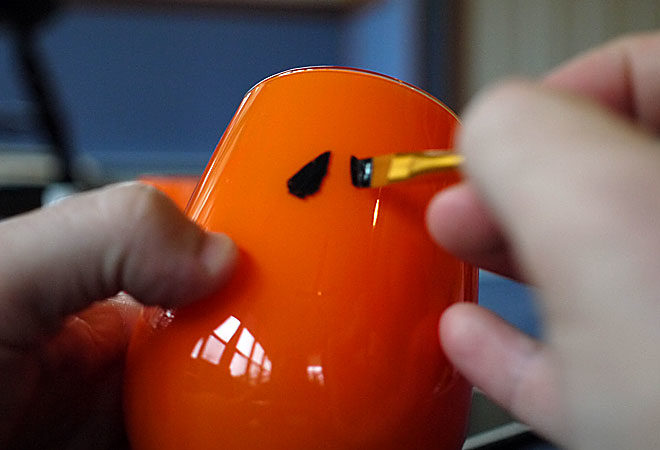
I have terribly unsteady hands so this was a painful process. However, I took my time and it all worked out. Pick some classic Jack-O-Lantern faces, or even some goofy ones to make you laugh, and get painting! I’d recommend cleaning the outside of the glass to remove your fingerprints and oils first.
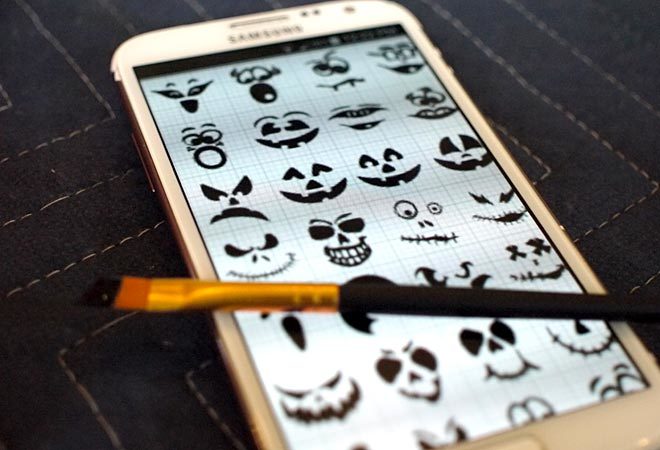
I’m not very artistic, but I can fake it pretty well! Instead of winging it, I did a quick Google image search for jack-o-lantern faces and picked my favorites to paint on my candle holders. If you’re more imaginative, you should definitely create your own from scratch!
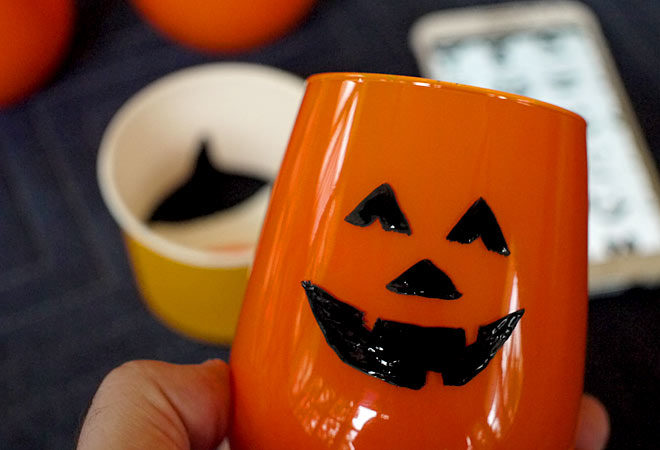
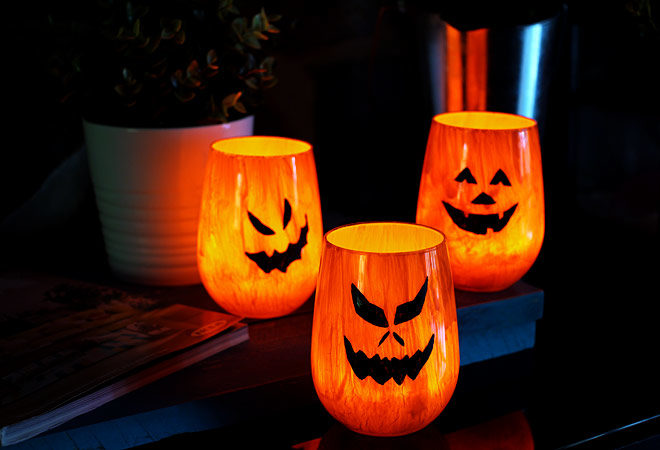
They didn’t turn out half bad!

I chose to paint an extra set of faces on the back of the glasses too. This gives me double the options for displaying in my house. If you put these on a coffee table or other central location in your space, it will mean the Jack-O-Lantern candle holders will be visible from all directions.

I chose LED tea lights for my project because I just wasn’t thrilled with the idea of a naked flame near the acrylic paint. I’m sure nothing would have gone up in flames, but an LED candle is safer around pets and young kids. So consider it.
But in the end, they look exactly the same as if they were real candles and they even flicker too.
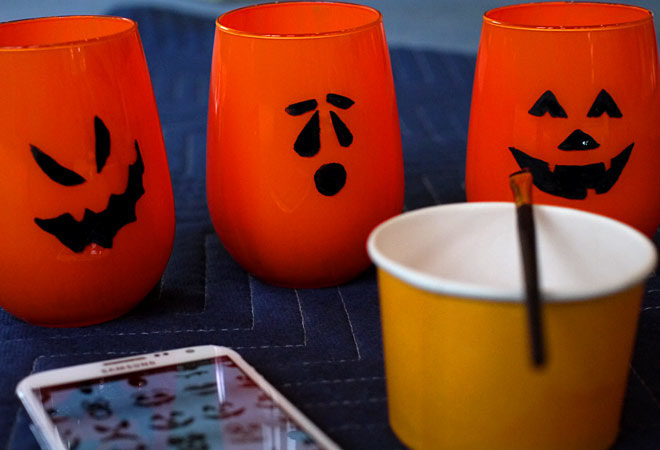
Completed DIY Jack-O-Lantern candle holders
I’m not usually one for crafting because I’m not very good with a paintbrush. But this project was just too fun not to try. I’m so glad I did because it turned out great!
The differences…
So for my version I said I made some changes to the original tutorial. Here are the differences and why I made them.
- In Karly’s tutorial, she poured two paint colors inside the glass bowls and swirled them around. I’ve painted with a foam brush and just stuck with one color.
This is mostly personal preference. I love the pink and orange color swirl she used, but I wanted a more traditional pumpkin look. I do wonder if pouring the paint inside would be a lot easier than painting however. - She used paint pens for the faces, while I used more acrylic paint.
This was the cheaper option since I didn’t have a black paint pen and they tend to be upwards of $7.00 each. I probably had the same trouble getting a streak-free finish though. - Real tea light candles vs fake LED candles.
As I said previously, I was a little nervous about putting a candle near the painted glass. Otherwise, just use what you have and save a couple more bucks.
You may want to follow along with the KPAprep tutorial here.
Karly’s project was super cool and I’m glad I gave it a try. Whether you choose my version or hers (or a combination of both), you should definitely try it out. It’s a fun project to do with your kids as well.
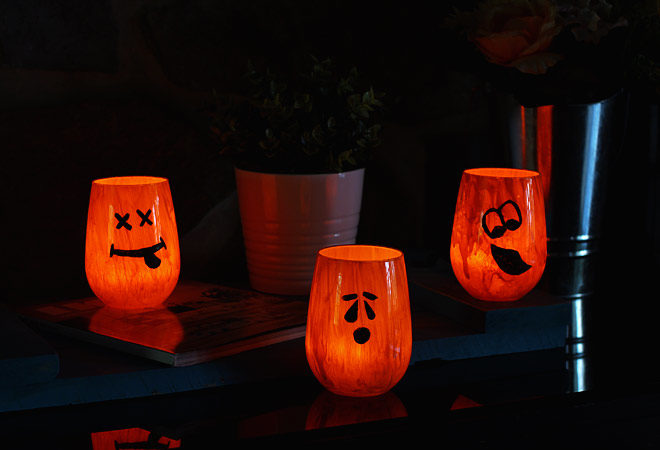
I love that I get to spin these around for even more pumpkin faces!
Now you go try it out for yourself!!! And Happy Halloween!